Crispy & Flavorful Gluten-Free Fried Chicken: Your Ultimate Allergy-Friendly Recipe (Top 8 Free)
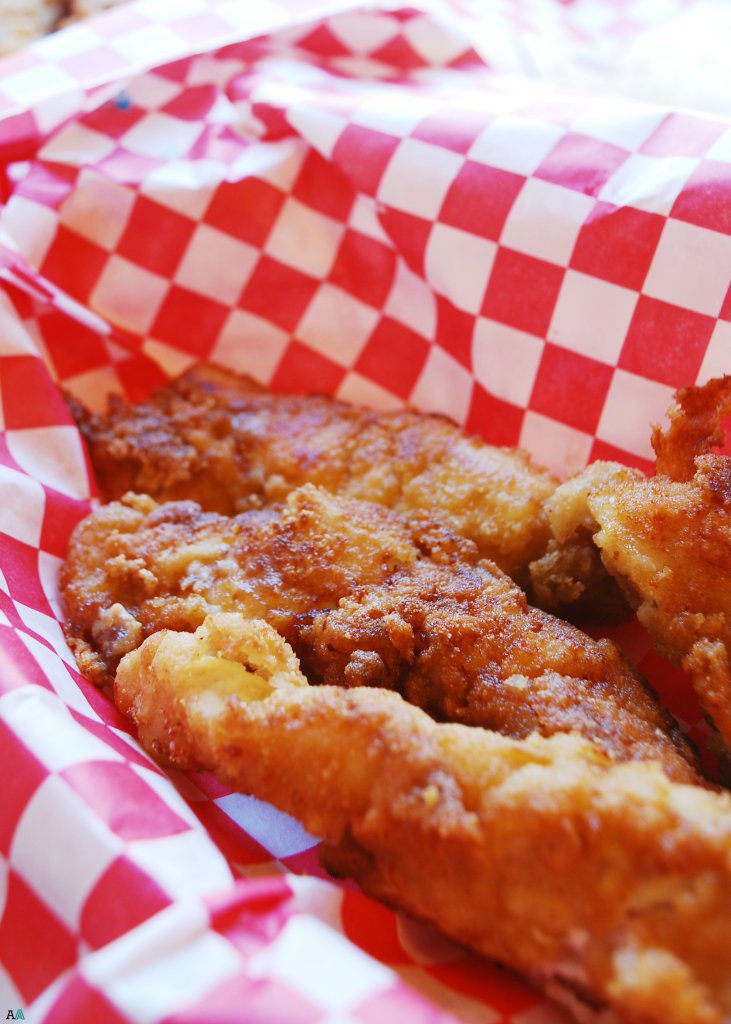
Discover the secret to perfectly crisp and incredibly flavorful gluten-free fried chicken. With a few innovative tricks, including the surprising use of a blender and everyday cereal, this unique recipe delivers that satisfyingly crunchy coating you crave. Best of all, it’s completely free of gluten, dairy, egg, soy, peanuts, and tree nuts, making it a safe and delicious option for those navigating the top 8 common allergens!

Please note: This blog contains affiliate links. While I received a complimentary Blendtec blender, all opinions shared are entirely my own.
Hello fellow food lovers! I hope you had a fantastic weekend. Mine was truly wonderful, filled with inspiring moments. But now, let’s dive into something equally amazing: this revolutionary fried chicken recipe that promises to change your kitchen game, especially if you’re navigating food allergies.
As an American, the love for fried chicken runs deep in my veins. It’s a quintessential comfort food, but for those with allergies, it often remains a distant dream. Traditional fried chicken typically involves a soak in buttermilk (dairy), a dip in eggs, and a dredge in wheat flour – a trifecta of common allergens! This makes enjoying this classic dish incredibly challenging for many.
Determined to reclaim this beloved entrée, I embarked on a creative culinary journey. My solution involves a couple of unexpected allies: everyday cereal and my trusty Blendtec blender. I know what you might be thinking – cereal? A blender? It sounds unconventional, but trust me, the results are nothing short of spectacular!

The Secret to Our Crispy, Allergy-Friendly Breading
Before my family’s allergy journey began, I was a huge fan of panko crumbs for their superior crunch. Faced with the need for an allergy-friendly alternative, I scanned my pantry and spotted a box of Rice Chex (any generic rice cereal works beautifully). Thanks to countless toddler-induced crumb-making sessions, I knew these cereals maintain their delightful crispness even when ground up. This realization sparked an idea that would become the cornerstone of my gluten-free fried chicken.
I tossed a few cups of Rice Chex into my blender, pulsed them into a perfect crumb texture, and then began experimenting with additional ingredients. This led me to discover what I confidently declare is THE BEST allergy-friendly breading. The addition of cornstarch proved vital for extra binding, ensuring the coating adheres beautifully to the chicken, while a blend of carefully selected spices provides that signature savory flavor. You’ll notice I omit paprika, a common fried chicken ingredient, due to my son’s EOE (Eosinophilic Esophagitis). However, if your dietary needs allow, feel free to include it for that classic hue and flavor depth.
Essential Frying Tips for Perfect Results
Achieving truly exceptional fried chicken, especially when navigating dietary restrictions, involves a few key techniques. First, I wholeheartedly recommend using a cast iron pan. Its superior heat retention and even distribution are unparalleled for frying, ensuring a consistent cook and a beautifully golden crust. Make sure you have one of these kitchen workhorses at the ready!
Secondly, patience is paramount when heating your oil. Do not introduce the chicken until your oil is shimmering, visibly hot, and showing slight ripples. This signals it’s reached the ideal temperature for frying – typically around 350-375°F (175-190°C). Frying at the right temperature ensures the chicken cooks quickly and develops a crisp exterior without becoming greasy or over-saturated with oil. You want that heat to be *kickin’*, as we say!

Okay, I admit, I have one more crucial tip for you: resist the urge to flip the chicken multiple times! Once it’s in the hot oil, let it cook undisturbed until it’s deeply golden brown on one side. The less you handle it with tongs, the more likely the precious breading is to stay intact. Put those tongs down and let the oil work its magic!
Choosing Your Chicken Cut
Personally, I prefer skinless chicken breasts for my fried chicken. I know, I know, it’s not the most traditional choice, but the thought of crunchy skin just isn’t for me! However, this recipe is incredibly versatile. Feel free to use your favorite cut of chicken – thighs, drumsticks, or even bone-in pieces – and keep the skin on if you prefer. The preparation process remains the same, but if you opt for dark meat or bone-in cuts, I highly recommend using a digital instant-read thermometer to ensure the chicken reaches an internal temperature of 165°F (74°C) for safe consumption.
My family absolutely adores this recipe. My husband considers it one of his favorite meals, and I concur! I hope this allergy-friendly fried chicken helps you enjoy a beloved classic in a new, inclusive way that perfectly fits your dietary needs. Just call me The Colonel of allergy-friendly fried chicken!
Which Flour Do I Need for Gluten-Free Fried Chicken?
One of the best features of this gluten-free fried chicken recipe is its simplicity when it comes to “flour.” The good news is, you don’t need any special gluten-free flour blends at all! Instead, we harness the power of finely crushed Rice Chex cereal to create that amazing crispy coating. This not only keeps the recipe effortlessly gluten-free but also adds a fantastic texture. A touch of cornstarch is added to the breading mixture, not as a flour substitute, but as an excellent thickening and binding agent, helping the coating adhere beautifully and achieve extra crispness. This approach simplifies your pantry needs and guarantees a delicious, allergen-free result.
How Can I Avoid The Breading Falling Off The Chicken?
Preventing your delicious breading from separating from the chicken is key to a perfect fried chicken experience. Here are six essential tips to ensure a beautifully adhered, crispy coating every time:
- Start with Dry Chicken: This is a crucial first step. Excess moisture on the chicken surface can create a barrier, preventing the breading from sticking. After cutting your chicken, pat it thoroughly dry with paper towels.
- The Wet-Dry-Wet Coating Method: Follow a specific order: dry (starch/cereal mixture), then wet (faux buttermilk), then back to dry (cereal breading). This layering technique builds a strong bond. When you’re in the final dry breading step, really press the chicken firmly into the coating to ensure maximum adherence and an even layer.
- Allow for a Rest Period: After the final breading, let your chicken sit, ideally in the refrigerator, for at least 30 minutes before frying. This resting time allows the moisture from the chicken to be absorbed by the breading, creating a paste-like layer that “glues” the coating firmly to the chicken. It’s a simple step that makes a huge difference.
- Ensure Your Oil is Hot Enough: The oil temperature is critical. It should be around 350°F (175°C) to 375°F (190°C). Use a digital instant-read thermometer to verify. If the oil isn’t hot enough, the breading will absorb too much oil and become soggy, making it more likely to fall off. Too hot, and it will burn before the chicken cooks through.
- Minimize Flipping and Handling: Once the chicken pieces are in the hot oil, resist the temptation to constantly move or flip them. Excessive handling can loosen the breading. Aim to flip the chicken only once, allowing each side to cook until perfectly golden brown and crisp.
- Drain on a Wire Rack: After frying, never place your chicken directly onto a plate lined with paper towels. This traps steam and moisture underneath, which can make the bottom of the breading soggy and prone to falling off. Instead, transfer the cooked chicken to a wire rack set over a tray or paper towels. This allows air to circulate around the entire piece, keeping the breading crisp and draining excess oil effectively.

Ingredients
- 3-4 chicken breasts, cut into thin strips
- 2 cups original rice milk + 2 Tablespoons lemon juice + optional hot sauce to liking
- 4 cups Rice Chex (or generic rice cereal)
- 1 and 1/2 Tablespoons of cornstarch
- 1/2 Tablespoon garlic salt
- 1/2 Tablespoon salt
- Canola oil (for frying)
- Cast iron pan
Instructions
- Begin by preparing your “faux buttermilk.” Combine the lemon juice and rice milk in a bowl. The acid from the lemon juice will curdle the rice milk, mimicking the texture and tenderizing properties of traditional buttermilk. If you enjoy a little heat, a splash of your favorite hot sauce is a wonderful addition here.
- Next, prepare your chicken. Ensure the chicken breasts are cut into thin, uniform strips. This is crucial for even and quick cooking. If your chicken pieces are too thick, the outside may brown and crisp before the inside reaches the safe internal temperature of 165°F (74°C). In such a case, you would need to transfer the partially fried chicken to an oven to finish cooking internally.
- Place the thinly cut chicken strips into the “buttermilk” mixture. Allow them to marinate and tenderize for a minimum of 30 minutes. This step is key for flavor and moisture.
- While the chicken is resting, prepare your signature breading. In your blender, combine the Rice Chex cereal, cornstarch, garlic salt, and plain salt. Pulse the mixture until the cereal is finely crumbled and all ingredients are thoroughly combined. You’re looking for a texture similar to coarse breadcrumbs.
- Pour this prepared breading mixture into a sturdy, thick brown paper bag. For extra security, especially if you’re breading a large batch, you might consider doubling the bag to prevent any tearing during the vigorous shaking.
- Remove the chicken strips from the “buttermilk” mixture. It’s essential to shake off any excess liquid very well; for the best adherence, even pat them dry lightly with paper towels. Place a few chicken pieces at a time into the brown paper bag containing the breading mixture. Shake the bag vigorously to ensure each piece is evenly and thoroughly coated.
- For an extra crispy layer, take the coated chicken pieces, dip them back into the “buttermilk” briefly, and then return them to the paper bag for a second shake in the breading crumbs. This double-breading technique creates a thicker, more robust crust.
- Once all the chicken is breaded, allow it to sit in the refrigerator for approximately 30 minutes. This crucial resting period helps the breading adhere firmly to the chicken. While it rests, begin heating your canola oil in the cast iron pan over medium-high heat. Use a digital instant-read thermometer to ensure your oil reaches approximately 350°F (175°C).
- Once the oil is at the correct temperature, gently lay the breaded chicken tenders into the hot pan. I find it best to start placing pieces around the outside edge and work my way towards the center, as the center of the pan often retains the most heat. Be careful not to overcrowd the pan, as this will lower the oil temperature and result in soggy chicken. Fry in batches if necessary.
- Allow the chicken to cook undisturbed until it is completely golden brown and crispy on one side before flipping it. The goal is to flip the chicken only once to prevent the breading from falling off.
- Once the chicken is cooked through and golden brown on both sides, carefully remove it from the pan. Transfer the cooked chicken to a wire rack placed over paper towels. This setup allows excess oil to drain away and keeps the chicken crisp by allowing air to circulate.
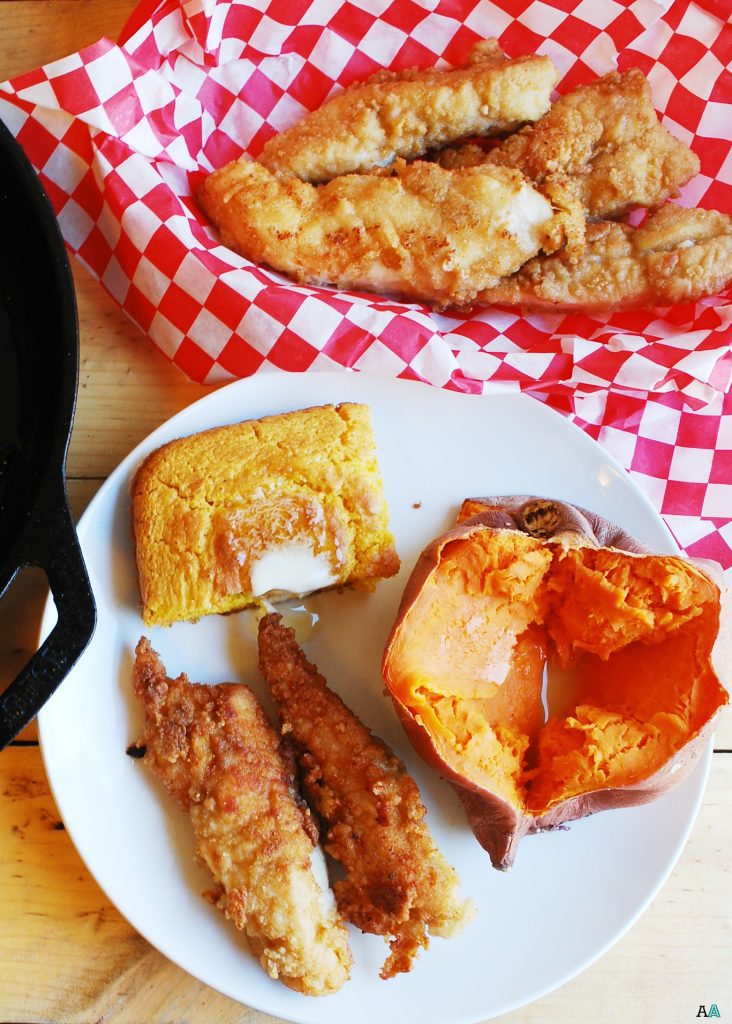
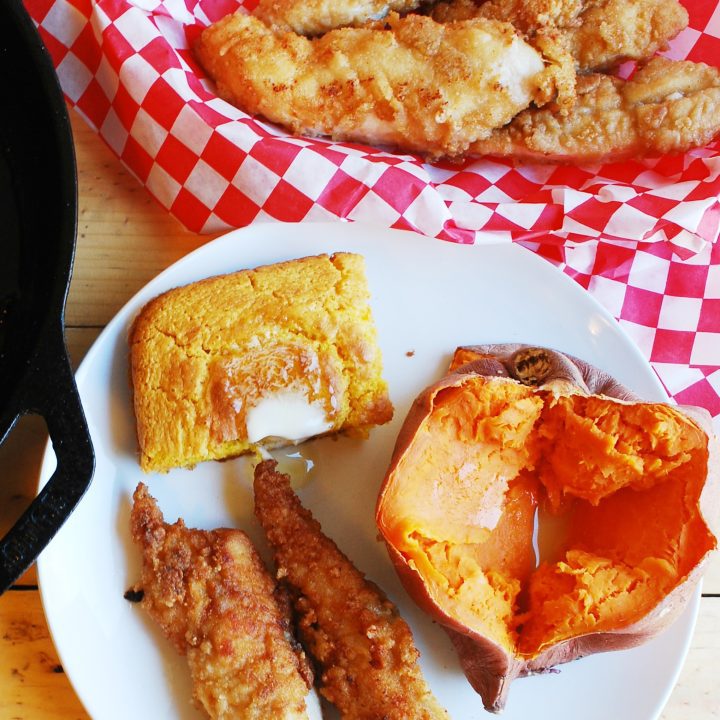
- Serve your delicious gluten-free fried chicken warm. We love pairing it with comforting sides like sweet potatoes and our safe cornbread.
- If you have leftovers and need to reheat them, always opt for a toaster oven or a conventional oven. Microwaving fried chicken will unfortunately turn the crispy breading into a mushy disappointment.
What Kind Of Oil Is Best For Frying Chicken?
For frying this delicious gluten-free chicken, I highly recommend using canola oil. It’s my go-to choice for several compelling reasons. Firstly, canola oil is widely available and relatively inexpensive, making it a practical option for everyday cooking. Secondly, it boasts a neutral flavor profile, meaning it won’t impart any unwanted taste to your chicken, allowing the seasoned breading and chicken flavor to shine through. Most importantly, canola oil has a high smoke point, typically around 400°F (204°C). This high smoke point is crucial for deep-frying, as it allows the oil to reach and maintain the high temperatures needed to create a crisp crust without breaking down, smoking excessively, or imparting a burnt flavor.
How Long Is Fried Chicken Good For?
While this gluten-free fried chicken is undeniably delicious, like all fried foods, it’s truly at its peak right after it’s cooked, when the breading is freshest and crispiest. For optimal texture and flavor, I highly recommend enjoying it on the first day. If you do have leftovers, they can be stored in an airtight container in the refrigerator for up to three days. Beyond that, the quality of the breading will significantly diminish, becoming less appealing.
What Is The Best Way To Reheat Fried Chicken?
Never, ever reheat fried chicken in the microwave. I repeat: do NOT microwave fried chicken! The microwave’s rapid heating method creates steam that will instantly turn your beautifully crisp breading limp and soggy, completely ruining the texture. The best way to revive leftover fried chicken and bring back its glorious crispness is by using a toaster oven or a conventional oven. Preheat your oven to around 350°F (175°C), place the chicken on a wire rack over a baking sheet, and heat for 10-15 minutes, or until warmed through and crispy again.
What To Serve With Gluten-Free Fried Chicken?
Gluten-free fried chicken pairs wonderfully with a wide array of classic comfort food sides, making it a versatile centerpiece for any meal! We particularly love it with my luscious crock pot sweet potatoes, or the savory baked beans from my allergy-friendly cookbook. Other fantastic accompaniments include our fluffy gluten-free cornbread, tender gluten-free biscuits, or a creamy bowl of my gluten-free mac and cheese. Honestly, any of the delicious sides from my comprehensive recipe index would be a perfect match, as everything on my site is designed to be gluten-free and allergy-friendly!

Gluten Free Fried Chicken Recipe (Dairy and Egg free)
4 servings
20 minutes
10 minutes
30 minutes
Finally a gluten-free AND egg-free fried chicken that is crisp and flavorful. Using a few secrets like: blenders and cereal, this is a unique recipe to get that crunchy, yummy coating that you’re wanting. Free of gluten, dairy, egg, soy, peanut and tree nuts this is also top 8 free too!
Ingredients
- 3-4 chicken breasts, cut into thin strips
- 2 cups original rice milk+2 Tablespoons lemon juice + optional hot sauce to liking
- 4 cups Rice Chex
- 1 and 1/2 Tablespoons of cornstarch
- 1/2 Tablespoon garlic salt
- 1/2 Tablespoon salt
- Canola oil
- Cast iron pan
Instructions
- Combine the lemon juice and rice milk. You are making a faux buttermilk by doing this. A splash of hot sauce is also nice if you like.
- Make sure to cut the chicken thinly, so that it can cook evenly and quickly. (If your chicken is too thick, and it’s not cooked to the required 165 degrees F by the time the outside is brown, you’ll need to place it in your oven to finish cooking internally.)
- Place the chicken strips in the “buttermilk” and allow to sit for 30 minutes.
- While the chicken rests in the mixture make the breading. Combine the cereal, cornstarch, garlic salt and salt in your blender. Pulse until the cereal is crumbled and everything is combined.
- Pour the breading mixture into a thick brown paper bag. (Sometimes I’ll double the bag, just to ensure it doesn’t break while I toss all the chicken.)
- Take the chicken out of the “buttermilk” and shake off the excess liquid very well, even pat drying it with paper towels for best results. Place the chicken in the brown paper bag (you can do several pieces at a time), and shake to evenly coat in the breading.
- Then, dip back into the “buttermilk” and then shake in the bread crumbs one more time.
- Allow the chicken to sit while you heat up your oil. You want your breaded chicken to sit in the fridge for around 30 minutes. Use a digital instant read thermometer to make sure your oil is around 350 degrees F.
- Once the oil is hot enough, gently lay the chicken tenders in the pan. I like to start on the outside and finish in the middle, since the middle is the hottest. Be sure to not overcrowd the pan.
- Allow the chicken to completely brown before you flip it. You want to only flip it once, to ensure the breading doesn’t fall off.
- Once the chicken is cooked through, remove it to a wire rack with paper towels underneath it to absorb the extra oil.
- Serve warm. We love to have it with sweet potatoes and my safe cornbread.
- If you have extra and need to re-heat it, be sure to do it in a toaster oven or oven as a microwave will make the breading mushy.
Notes
If you want less of a mess, you can try my Oprah’s Unfried Chicken Made Gluten Free.

Don’t forget to pin this incredible recipe so you don’t lose it!

